Rest API
The Rest API plugin simply connects the event mobile application with your WordPress site. In simple words, it syncs all your website data including organizers events, users and more with the WP Event Manager Mobile application.
Rest API installation
Just like installing any other premium plugin of WP Event Manager, you need to make sure that you have the core plugin installed on your system.
You can install the Rest API plugin in two ways.
Manually: You can also install the plugin manually using SFTP or FTP tools. Click Here to see how you can install the plugin manually.
Automatically: You can install the plugin from the backend of your WordPress. Click Here to see how you can install the plugin automatically.
General settings
The general settings in the REST API plugin allows organizers to use the application freely.
Perform the following settings to work with the app:
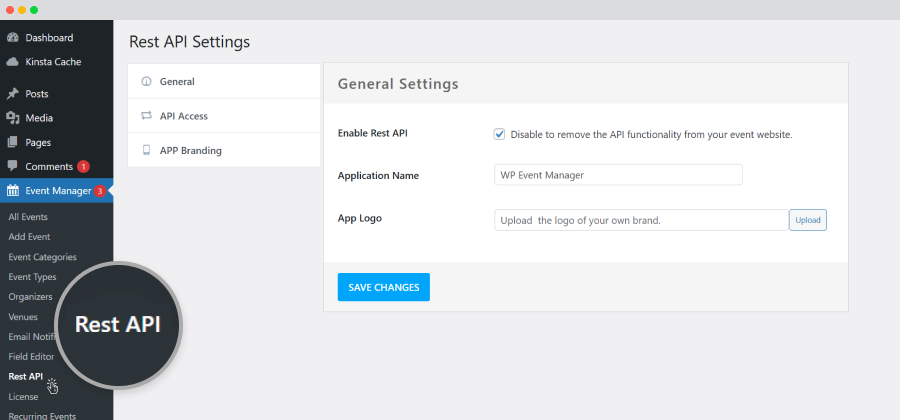
- Please go to WP Admin >> Event Manager >> REST API >> General settings.
- Here, you will get two options

- Enable Rest API key: you can tick mark the option to enable the Rest API functionality or leave it blank to disable it from your events website.
- App Logo: you need to upload the logo that you want to display on your mobile application.

API Access Settings
These settings enable you to create an API key that further needs to be entered in the mobile application at the time of Signing in.
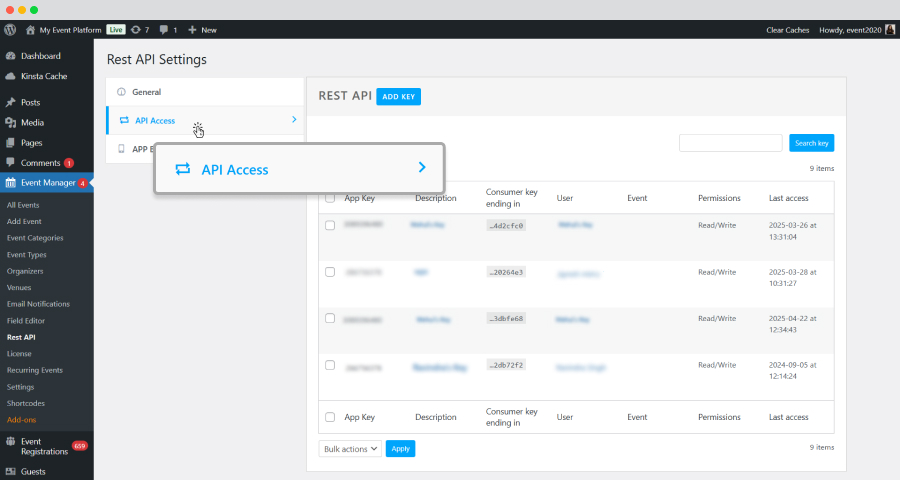
- Please go to WP admin >> Event Manager >> REST API >> API access.
- Click on Create an API key.
- After filling in the details such as,
- The admin can generate the APP key, by clicking on Generate API Key.
- After generating the API Key a user needs to click on the API access option that displays all the keys generated on this website in a dashboard.
- In order to revoke the API key, one can click on the key name under the description section, and revoke the key from there.


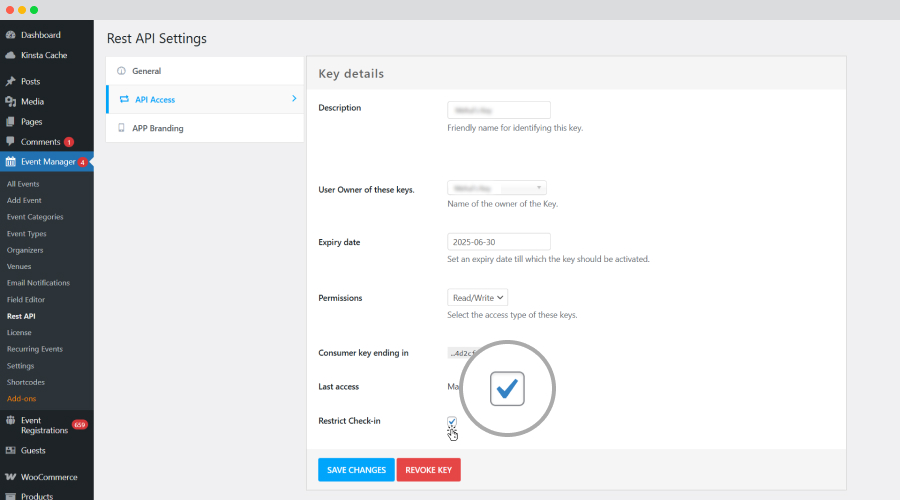
a. Description friendly name, for identifying this key: It is the name that will help you distinguish one key from another.
b. User or owner of the key: choose among the list of people who can use the key.
c. Expiry date: The date till which the key shall remain active.
d. Permission Type: You can decide the permission type from amongst- Read, Write, or both.


Restricting the Check-in Option
Users can now restrict the Check-in option using the REST API addon. Here are the steps to follow:
- Go to WP Event Manager in the admin panel.
- Click on REST API.
- Click on the API access option.
- Enable the Restrict Check-in option.
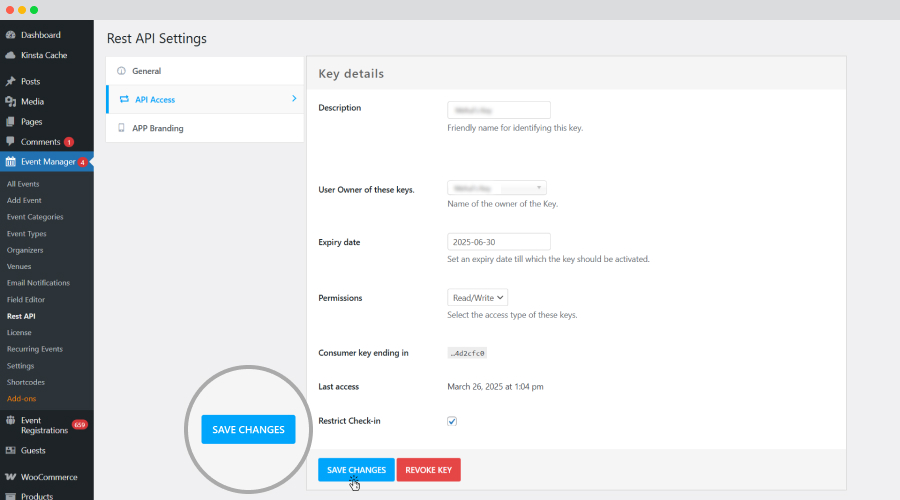
- Save changes.


Users can use this option to restrict attendee check-ins once the check-in time window is over.
App branding
The App Branding option gives admins and organizers the right to select the color of the application.
The color plays a significant role in branding the application based on the company theme. For instance, WP Event Manager uses the Blue and White colors as its brand identity. Hence the application also follows the same color. Here, the user gets the freedom to choose the theme color.
To access the app branding page, you need to follow the below mentioned steps:
- Please go to WP Admin >> Event Manager >> REST API >> App branding.
- You will find the following here:
- Primary: Base color of the application.
- Success: Color of application messages.
- Info: Color of the information displayed on the application.
- Warning: Color of the warning message.
- Danger: Color of application messages.
Additionally, users can also check how the selected color of the application looks when the dark and light theme is activated. This can be seen from the mode present on the right-hand side of the app branding settings.

 Use coupon code:
  Something exciting is coming soon – stay tuned to find out! 🚀✨