Adding Your First Event
With WP Event Manager, it is simple to add your first event using shortcodes. In this guide you will learn about the entire process of adding an event to your website.
Adding your first event using the frontend event submission form
WP Event Manager gives organizers and guests the freedom to add events independently from the frontend using the Event Submission form. The event submission form is the form that needs to be filled in with all the necessary event details during adding an event.
Page setup
To display the Event Submission form, users need to create a new page from the pages menu at the Admin Panel. Here, the shortcode [submit_event_form] needs to be added.
Setting up pages:
Follow the below mentioned steps to create a new page:
- WP Admin >> Pages >> New Page.
- Add a suitable title to it which is related to submit event.
- Paste the shortcode [submit_event_form]

The best way to insert the shortcode is to paste it in the text view of the WordPress visual Editor to ensure it gets formatted correctly.
Event Submission steps to add your first event
The event submission process covers the following steps:
- Account creation.
- Filling up the form with event details.
- Adding the details of the organizer.
- Previewing the event created.
Account creation
The first step that you need to take to create an account is to sign up on the frontend.
-
- If the user is logged in, the form row data shows “Your account: You are currently signed in as (your username). Sign out”.
- If the user is logged out, creating accounts is not mandatory, and “Allow account creation”is disabled this shows a sign-in link.

Event Form Detail
After the account section, you will be redirected to the Event Submission form in which you need to fill in the details of your event.

The Event Fields in the Event Submission form covers the following:
- Event Title.
- Event Type.
- Event Category.
- Online Event.
- Zip code.
- Event Location.
- Event Banner.
- Description.
- Registration email/URL.
- Video URL.
- Start date.
- End date.
- End time.
- Registration Deadline.
- Registration Limit.
- Organizer.
- Venues.
Note: You need to keep in mind that Event Thumbnail and Event Banner are two different things. If a user uploads an event banner, he will be able to see the changes he made in the banner only. Similarly if a user makes any changes to the event thumbnail, the change will only be visible on the event thumbnail on the event listing page.
Organizers details
Event submission form, you need to add the organizers’ details.
The organizers’ form covers the following details:
Under the organizer details section, click on the Click here option and fill in the following details:

- Organizer name.
- Logo.
- Description.
- Organizer Email.
- Website.
- Facebook.
- Instagram.
- Youtube.
- Twitter.
Click on the Add Organizer Button.

These fields will be pre-filled where appropriate if the user is logged in and has submitted an event in the past.
Venue details
To add a new venue details, click on the Click here option under the Venue details section and follow the below mentioned details:
- Venue name.
- Venue Description.
- Logo.
- Website.
- Facebook.
- Instagram.
- Youtube.
- Twitter.
Click on the Add venue Button.

Preview of First Event
The preview page gives an idea to the users about the appearance of theri first event on the website.
It displays the event details that have been submitted in the style of a single event listing. At this stage, the user can make changes to the specified details of the event listing through the Edit option or simply click on the Submit option to submit the event for approval.

Confirmation
After submitting your first Event Listing, you will receive an email message based on the current status of the event listing.
Change in Admin UI
We have recently changed our Admin UI which admins can see while adding a new event or editing an existing one.
Here are the changes that admins will experience:
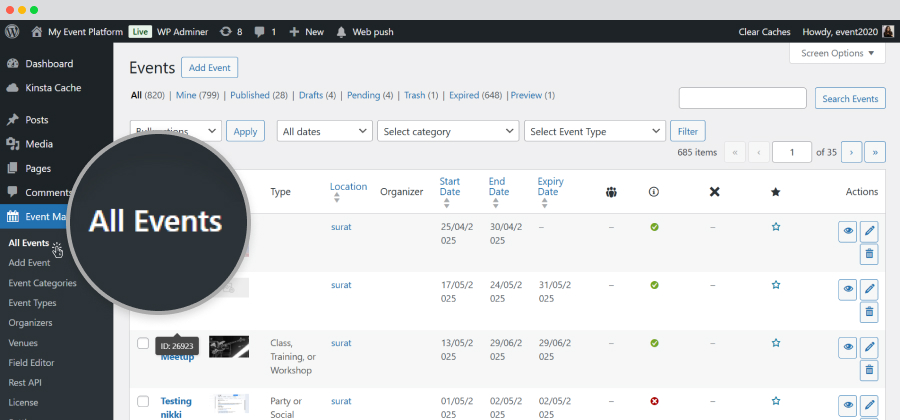
- Go to Event Manager.
- Click on All Events.
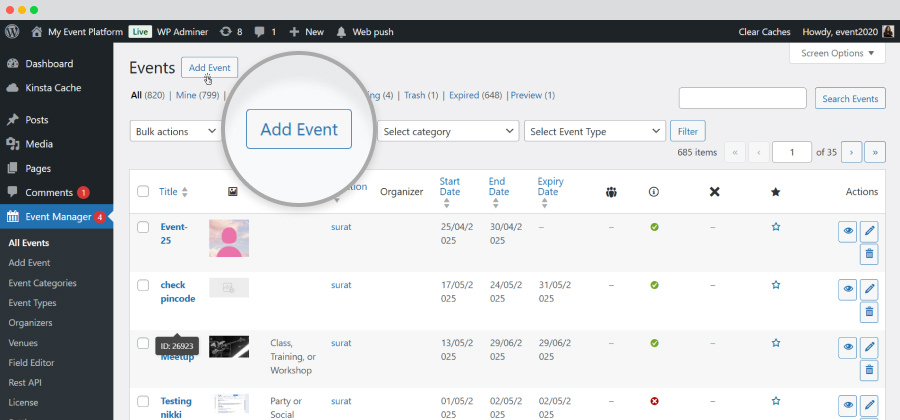
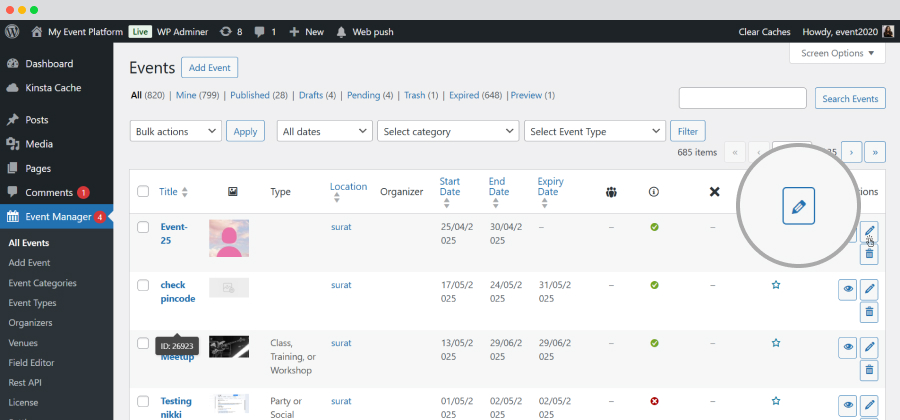
- Press the Add Events buttons for a new event or choose an event from the list of the existing events and click on the Edit icon.
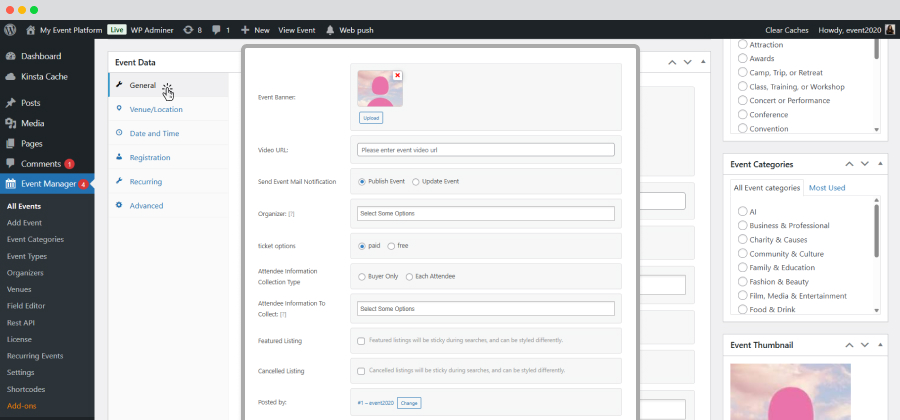
- On this page, the Event Data UI is changed and improved for a better user experience.
- General .
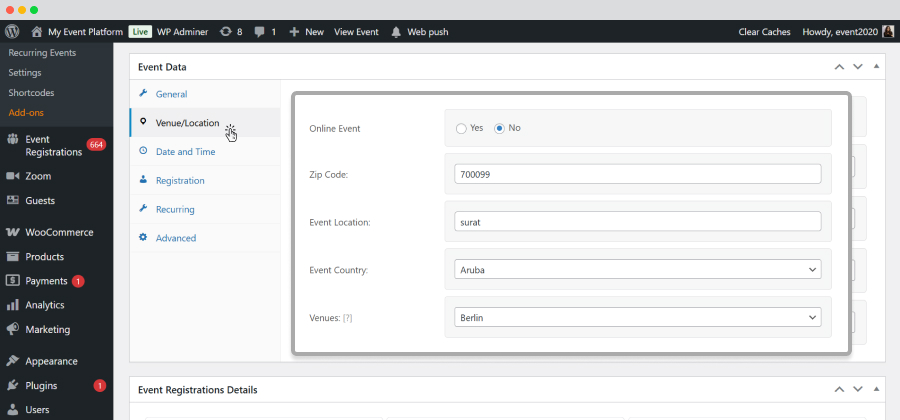
- Venue/location.
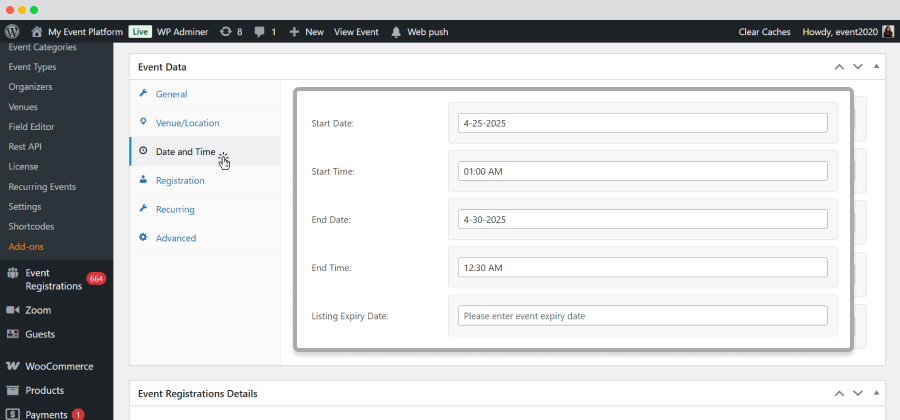
- Date and time.
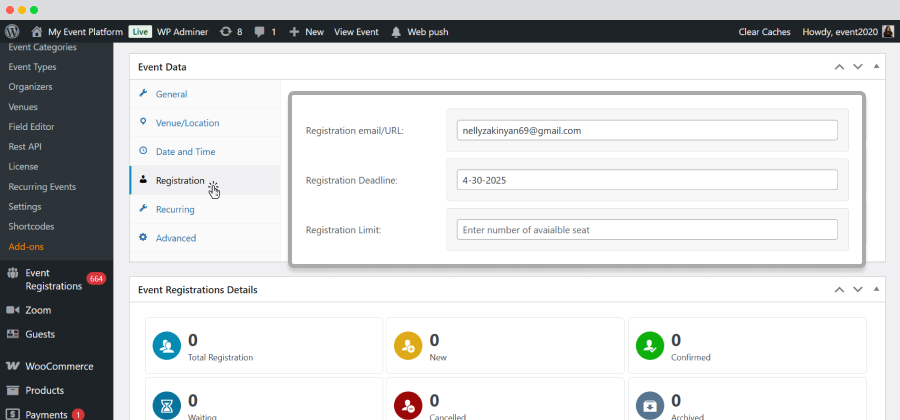
- Registration.
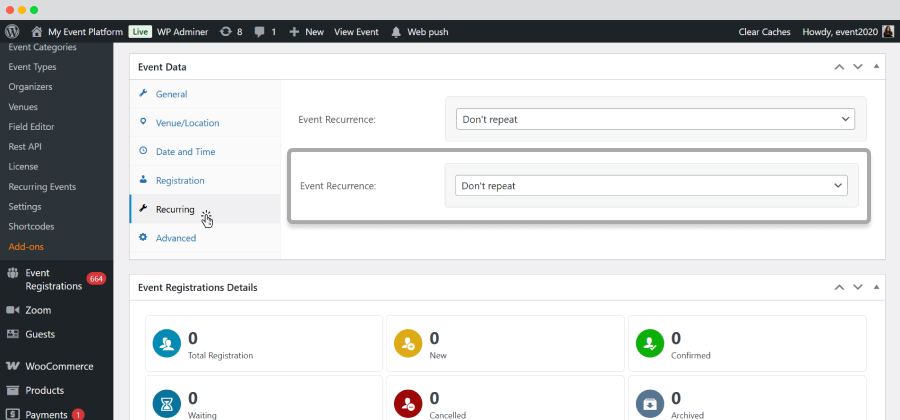
- Recurring.
- Zoom.
- Advanced.
- Go to WP-Admin.
- Click on Event Manager.
- You can add the health guidelines at the time of adding a new event or editing an existing one.
- Click on Add event for a new event.
- Choose your preferred event from the listed events and press the Edit icon.
- Go to the Event Data section and choose the Advanced option.
- Here you will find the Enable Health Guidelines option. Tick on Yes to enable the option or No to disable it.
- When you tick on Yes then need to enable which health guideline to show on the event details page.
- Here you will find the Other Additional health guidelines option. Tick on Yes to enable the option or No to disable it.
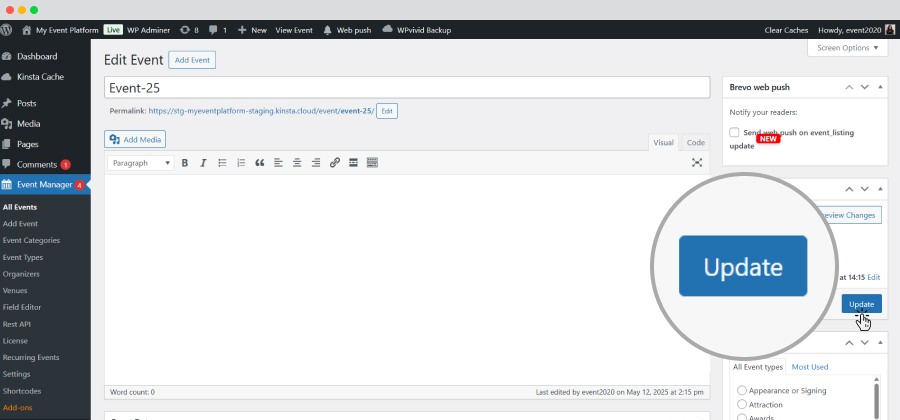
- When you choose Yes , you will find a box where you need to add the health guidelines for your attendees. At last click on the update button for save settings.
Unlike the previous one where event data had to be added on a single tab, we have divided all the data fields into different tabs that include:
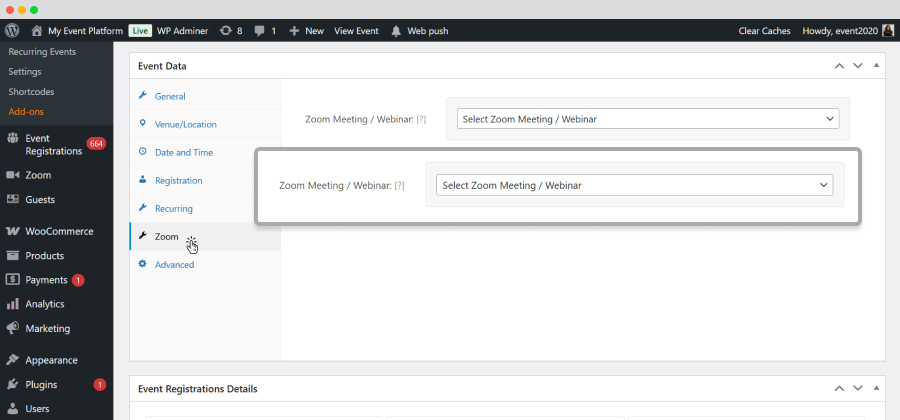

A Health Guideline feature is added
Our users can now add health guidelines to their events while adding or editing them by following the simple steps mentioned below:
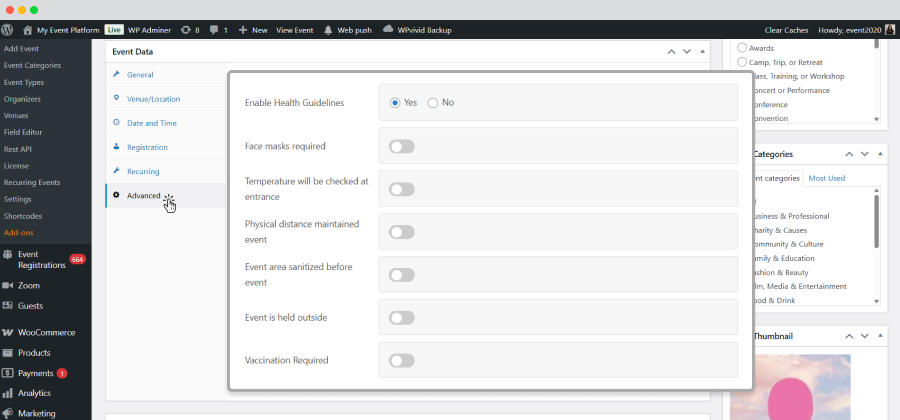
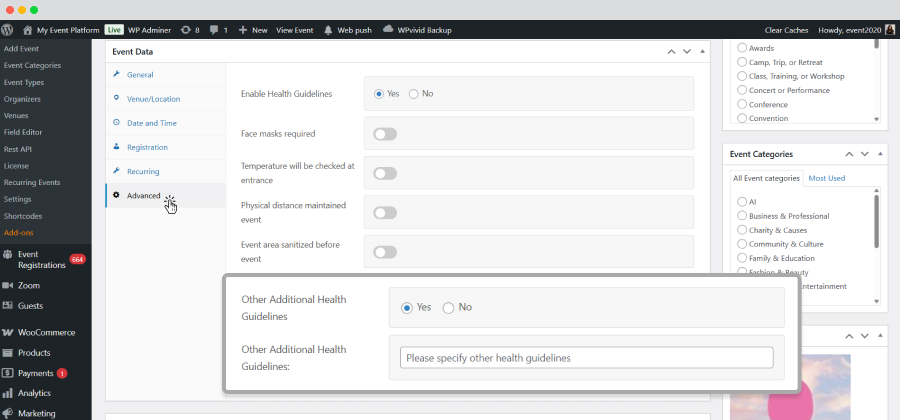
Once you add it, it will be displayed on the Event details page.
The same can be done from the front end as well. While adding an event from the frontend on the post an event page, you will get the same health guideline fields, using which you can add the health guideline for your event details page.

Customization of the event submission form
You can add, edit, or remove fields from the Event Submission Form using the Field Editor. You can check the tutorial for editing fields.
 Use coupon code:
  Something exciting is coming soon – stay tuned to find out! 🚀✨