Other Settings
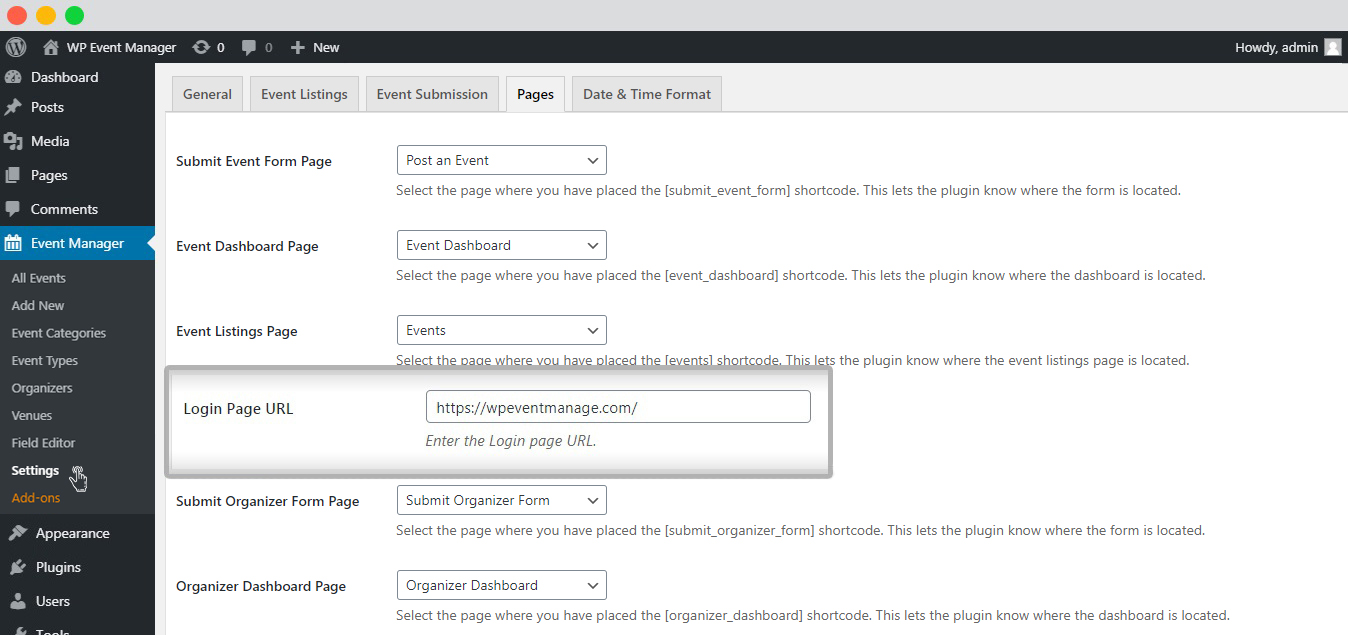
The Pages tab under the settings option contains the settings that help you make changes to the destination pages. These destination pages have the shortcodes to create WP Event Manager Plugin pages like Event forms page, the event dashboards page, the event listings page and the login page URL.
To access the Pages tab in the settings section, here are the steps you need to follow:
- Go to wp-admin>>Events Manager>>Settings.
- Select the Pages tab and click on it.
- You will get the following options where you can make your desired changes.
- Submit Event Form Page: It is a drop-down menu of pages from which you need to select the one where you have placed the [submit_event_form] shortcode.
- Event Dashboard Page: It is another dropdown menu of pages from which you need to select the one where you have placed the [event_dashboard] shortcode.
- Event Listings Page: It is another dropdown menu of pages from which you need to select the one where you have placed the [events] shortcode.
- Login Page URL: Here you need to enter the login page URL.
- Submit Organizer Form Page: It is another dropdown menu of pages from which you need to select the one where you have placed the [submit_organizer_form] shortcode.
- Organizer Dashboard Page: It is another dropdown menu of pages from which you need to select the one where you have placed the [organizer_dashboard] shortcode.
- Submit Venue Form Page: It is another dropdown menu of pages from which you need to select the one where you have placed the [submit_venue_form] shortcode.
- Venue Dashboard Page: It is another dropdown menu of pages from which you need to select the one where you have placed the [venue_dashboard] shortcode.
- Calendar Page: It is another dropdown menu of pages from which you need to select the one where you have placed the [events_calendar] shortcode.
- Click on Save Changes.

Changing the Login Page URL
To change the login page URL, you need to follow the below-mentioned steps:
- Go to Events Manager >> Settings >> Pages.
- Go to the Login Page URL.
- Click on the text box and enter the correct URL.
- Click Save Changes.
Date & Time Format Settings
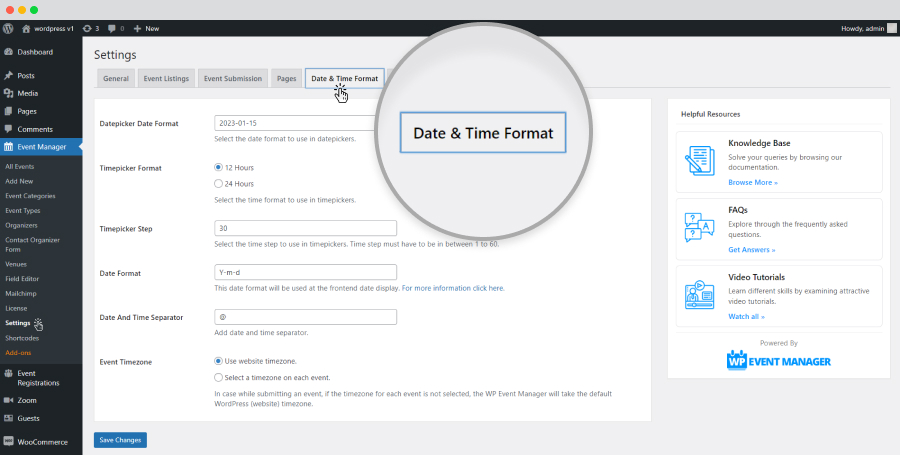
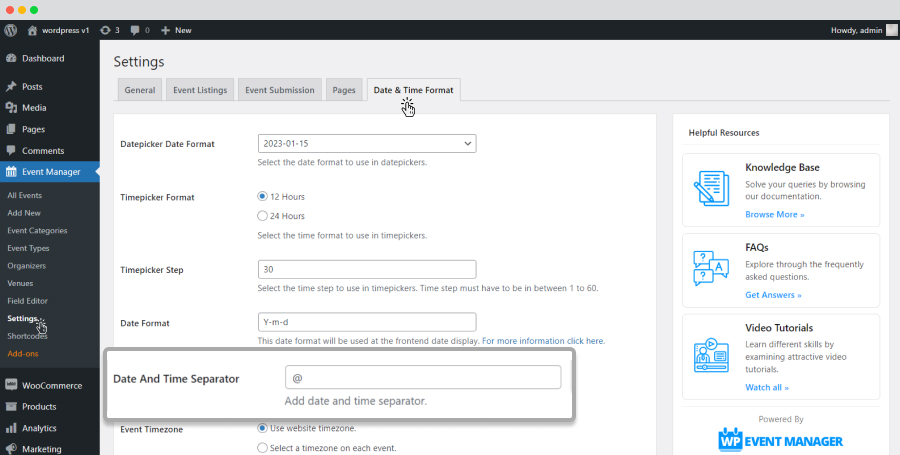
The Date and Time format tab consists of the settings that helps the admin to manage the way the date and time format appears on the website for events. The event organizer has to set the event start dates, end dates, registration deadline, and deadlines while enlisting an event on the website. Using these settings, you can edit the format in which the date and time form appear on the submission form, event listing and event detail page and the admin side on the event menu. In simple way the format you select here remains the same everywhere on your website.
To access the date and time settings, follow the below mentioned steps:
- Go to wp-admin>>Events Manager>>Settings.
- Select the Date and Time format and click on it.
- Here are the setting options you will get at this section:
- Datepicker Date Format: It is a dropdown menu of different date formats from which you can choose your preferred one to use in the Datepicker.
- Timepicker Format: You need to select your preferred time format from the available list.
- Timepicker Step: You need to select the time step which signifies the interval time in between an hour.
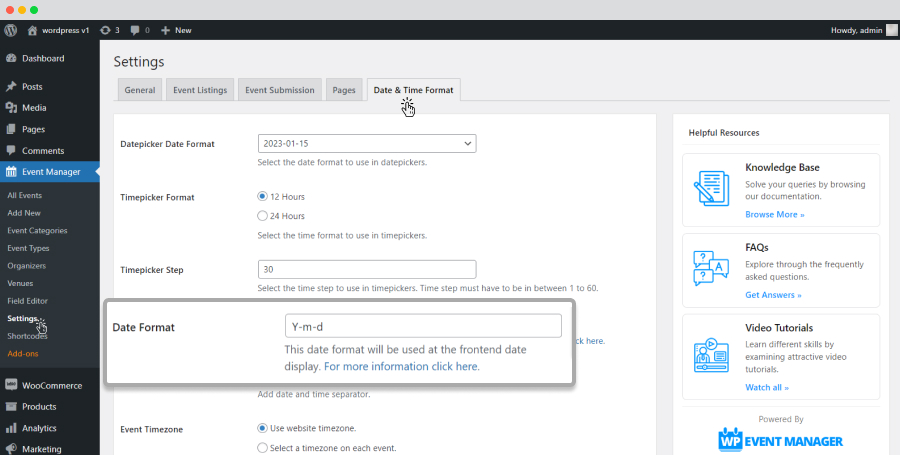
- Date Format: Select your preferred date format that you want in the frontend date display.
- Date and Time Separator: Add a symbol to separate event date and time at the frontend event listing pages.
- Event Timezone: You need to select your preferred time zone here. Keep in mind that if you do not choose a timezone then WP Event Manager will take the default WordPress timezone.
- Save changes.
Datepicker Date Format
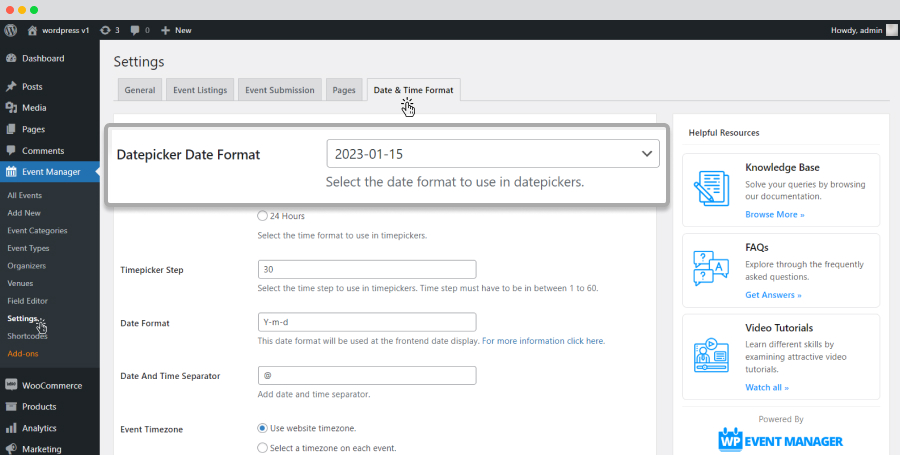
The Datepicker Date format dropdown list contains various date formats. Different countries and localities use different ways of representing dates. The variety offered in the drop-down list allows you to customize the date based on the popularly used date format in the location.
- Go to Event Manager >> Settings >> Date & Time Format.
- Select the options from the drop down box next to Datepicker Date Format.
- Click Save Changes.
Timepicker Format
Change the timepicker format from 24 or 12 hours for adding and displaying in each event.
- Go to Event Manager >> Settings >> Date & Time Format.
- Tick the box next to the Timepicker format.
- Click Save Changes.

Timepicker Step
The Timepicker Step text box allows you to edit and enter an interval between an hour.
- Go to Event Manager >> Settings >> Date & Time Format.
- Tick the box next to the Timepicker step.
- Click Save Changes.

Date Format
The Date Format text box allows you to make changes in the sequence of day, month and year in the date format that appears in the event pages at the frontend.
- Go to Event Manager >> Settings >> Date & Time Format.
- Check the box next to Date format.
- Click Save Changes.
Date And Time Separator
The Date and Time Separator box allows you to enter any symbol that separates the date and time in the event listing pages at frontend.
- Go to Event Manager >> Settings >> Date & Time Format.
- Check the box next to Date And Time Separator.
- Click Save Changes.
Event timezone
The Event Timezone radio buttons allow you to choose between the website timezone and the option to set a timezone for each event. If you target audiences globally then choosing the “ Select Timezone on each event” option would be appropriate for you and you will be able to see the selected timezone for each event at the event submission time. On the other hand, if you serve only the local audience, you can stick to the standard Website timezone.
- Go to Event Manager >> Settings >> Date & Time Format.
- Check the box next to the Event timezone.
- Click Save Changes.

 Use coupon code:
  Something exciting is coming soon – stay tuned to find out! 🚀✨