Mailchimp
The Mailchimp plugin lets you assemble and synchronize all your attendee data, reports and marketing channels at one place.
Installing The Plugin
The installation process is the same for all the addons, offered by WP Event Manager. They can be both installed automatically and manually.
- Automatic Installation: You can install the plugin from the backend of your WordPress. Click Here to see how you can install the plugin automatically.
- Manual Installation: You can also install the plugin manually using SFTP or FTP tools. Click Here to see how you can install the plugin manually.
Obtaining MailChimp API keys
To obtain the Mailchimp API key, here are the steps you need to take.
- Login to your Mailchimp account.
- Click on your profile avatar and select the Account & Billing option.
- Click on Extras>>API Keys.
- Click on Create a key.
- Add API key name and click on the Generate key option.
- After the key is created you will see the key in the “Your API key” section.


MailChimp Settings at the Admin Panel
- Go to wp-admin>>Events Manager>>Mailchimp>>Settings.
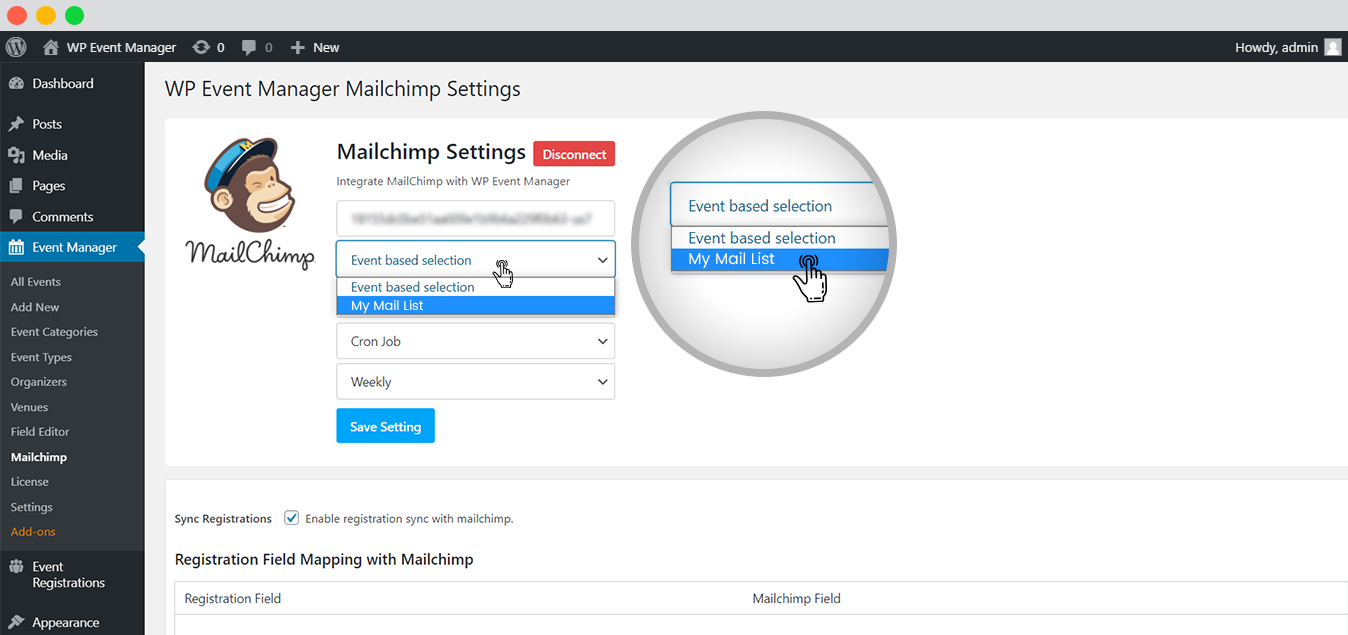
- At first, you need to paste the API in the text box to integrate Mailchimp with WP Event Manager.
- Then, you need to select the audience list syncing type from the following options:
- WP Event Manager.
- Event based selection.
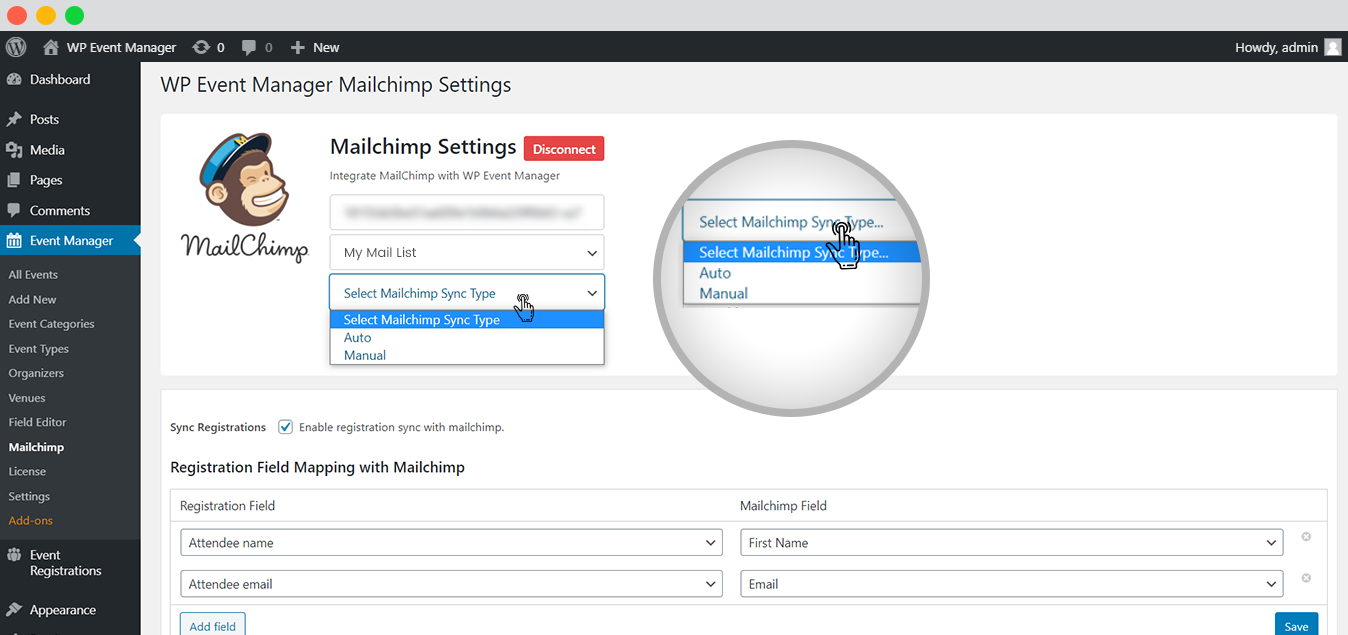
- Select mailchimp sync type from the dropdown with the following option:
- Manual.
- Auto.
- When you choose the auto option, you get two more options:
- Select Mailchimp sync via:
- Cron job: When you select Cron Job, you get an option to sync the data when the cron job is run, 5 Min, Daily, Weekly, Monthly, or Yearly.
- When new created: As soon as a new user registers, the person’s details get automatically synced to the Mailchimp list.
- Mailchimp sync schedule: choose your preferred sync schedule from the dropdown.

Here you will get the following options:


How To Manually Sync the Data at the Admin panel
In order to manually sync the attendee data, a user has to manually select the Sync type while setting up the Mailchimp plugin.
1. Manually Sync Registration Data
To manually sync the Registration data, here are the steps you need to take,
- Go to Wp admin >> Event Registrations >> All Registrations.
- Select the events/ and check mark the audiences to be synced. (the registrations received for the event)
- Click on Bulk Action.
- Click on Sync with Mailchimp.
- Check mailchimp account.
- All the data will be synced.
Also, the status of the user synced can be seen in the mailchimp column, as subscribed, just before the user status on the same dashboard.

Organizer field mapping with Mailchimp:
Check the “Enable organizer sync with Mailchimp” option.
The Organizer field mapping with Mailchimp section allows you to add your preferred fields to the following sections.
Organizer fields: You can select your preferred organizers’ fields from the dropdown menu.
Mailchimp fields: you can select your preferred Mailchimp fields from the dropdown menu.
The plugin also allows you to add more fields to the above mentioned sections using the Add Field option.

Registration Field Mapping with Mailchimp
Tick the “Enable registration data sync with Mailchimp” option.
Registration field: Choose your preferred registration fields from the drop down menu.
Mailchimp field: Choose your preferred Mailchimp fields from the dropdown menu.
The plugin also allows you to add more fields to the above mentioned sections using the Add Field option.
To access the registration page follow the below mentioned steps:
WP Admin>> Event Registrations >> Registration forms >> form fields


Guest field mapping with Mailchimp
Enable the “Guest list sync with Mailchimp option”.
Guest List Field: Choose your preferred Guest List fields from the drop down menu.
Mailchimp Field: Choose your preferred Mailchimp fields from the dropdown menu.
The plugin also allows you to add more fields to the above mentioned sections using the Add Field option.
Click Save.

Mailchimp Settings at the Frontend
The organizers can sync their user’s data from the frontend in their mailchimp account. Here are the steps they need to follow:
- Go to the Event dashboard >> MailChimp >> Settings.
- Just under the Mailchimp settings option you will get the following dropdown menus:
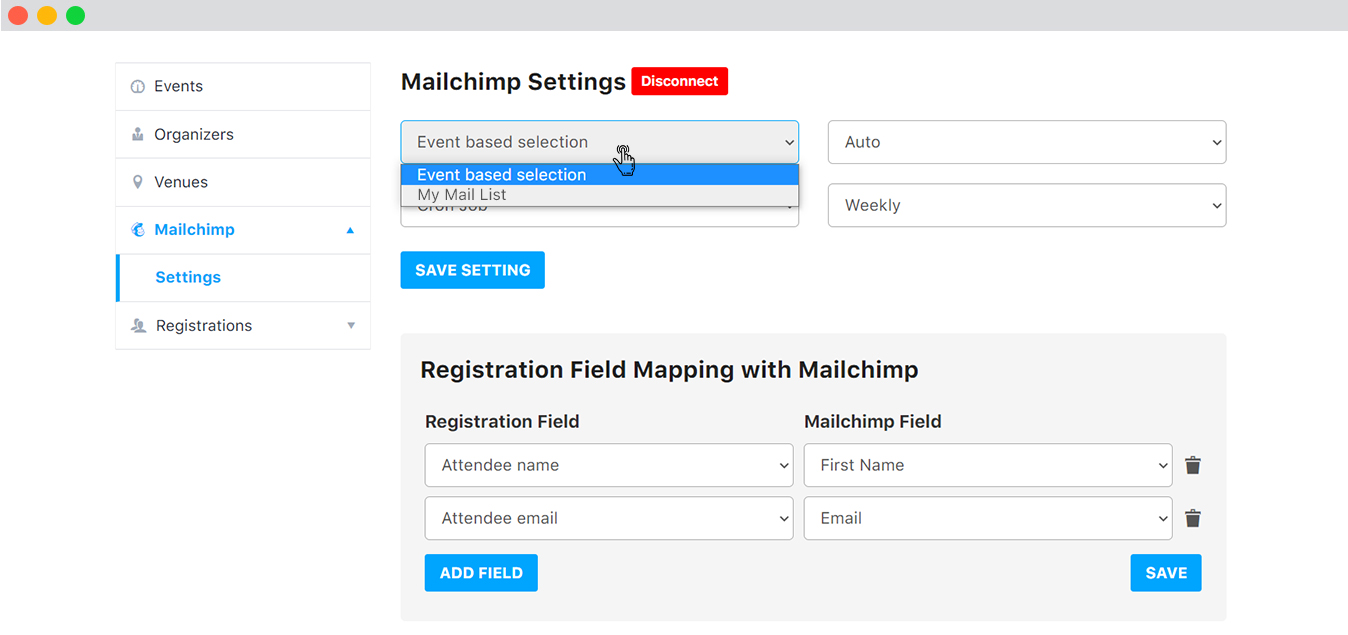
- From the first drop down you need to select the audience list type which could either be.
- WP Event Manager (all events).
- Event Based selection.
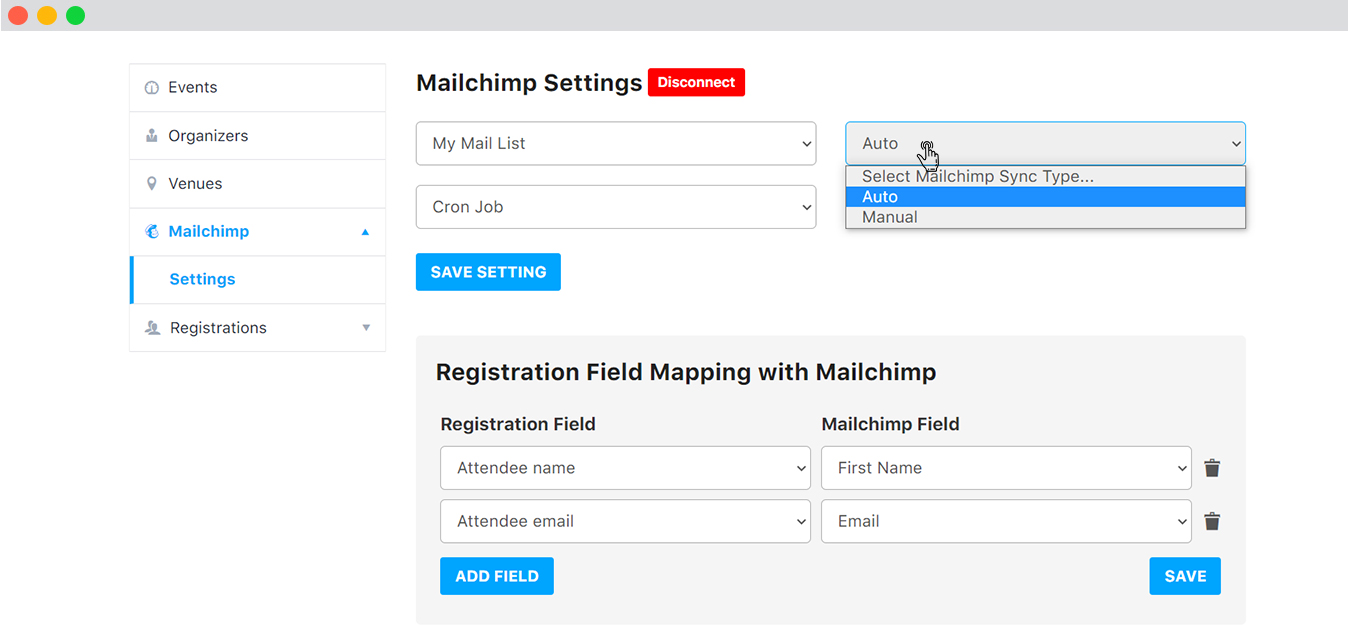
- In the next drop down menu you need to select the Mailchimp sync type which either be.
- Manual.
- Auto.
- When you choose the Auto option, you get two more options.

- Select Mailchimp sync type via: it is a dropdown menus which comes with two options:
- Cron job: When you select Cron Job, you get an option to sync the data when the cron job is run, 5 Min, Daily, Weekly, Monthly, or Yearly.
- When new created: As soon as a new user registers, the person’s details get automatically synced to the Mailchimp list.
- Select Mailchimp via sync schedule: based on your requirement, you can select the sync schedule in 5 minutes, daily, weekly, monthly or yearly.
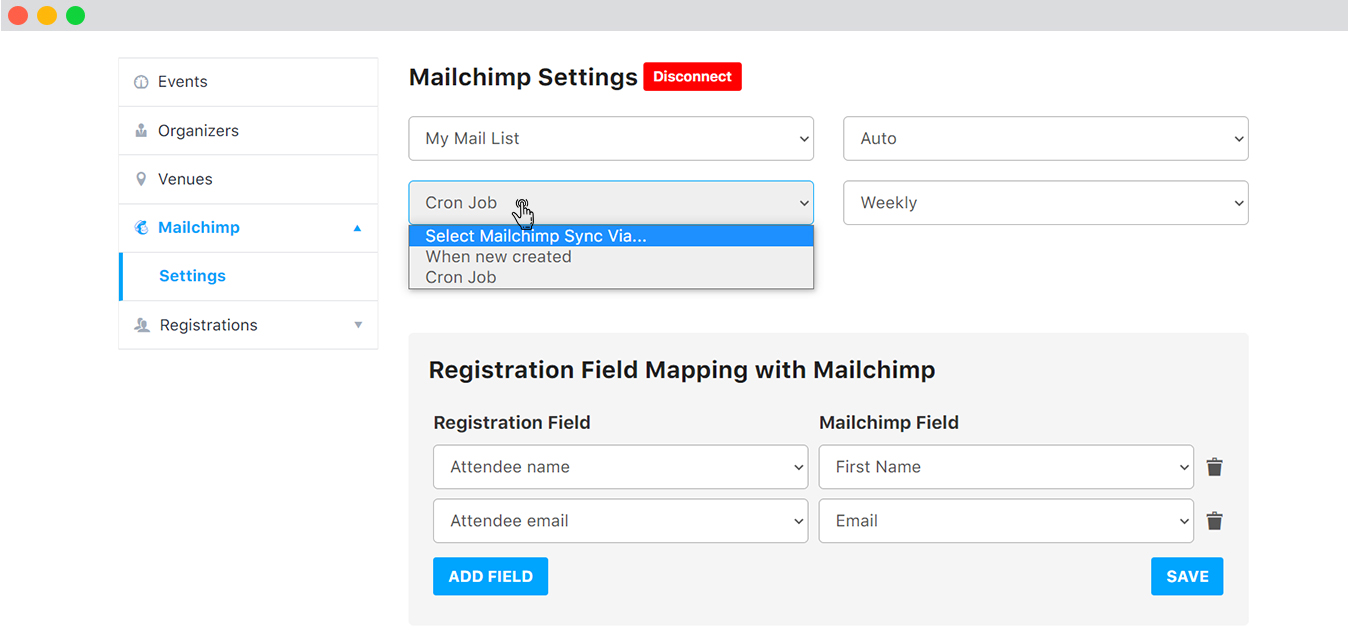

- Manual: When you select the Manual sync type, the data gets synced only after the Admin manually syncs it.
Delete Mailchimp Data: you can enable this option if you want to remove the Mailchimp data when the plugin is deleted. Keep in mind that once the data is removed, it can not be retrieved.
Organizer field mapping with Mailchimp
Here, you need to first check the option “Enable organizer sync with Mailchimp”.
You will get two options in this section:
- Organizer field: Choose fields as per your requirement.
- Mailchimp field: Choose fields as per your requirements.
- Registration field: Choose fields as per your requirement.
- Mailchimp field: Choose fields as per your requirements.
- Guest List field: Choose fields as per your requirement.
- Mailchimp field: Choose fields as per your requirements.
- Contact Organizer field: Choose fields as per your requirement.
- Mailchimp field: Choose fields as per your requirements.
Add Field: You can also add new fields based on your preferences.
Click Save.

Registration Field Mapping with Mailchimp
Here, you need to first check the option “Enable Registration Field Mapping with Mailchimp.”
You will get two options in this section:
Add Field: You can also add new fields based on your preferences.
Click Save.

Guest List Matches Attributes
Here, you need to first check the option “Enable Guest List sync with Mailchimp.”
You will get two options in this section:
Add Field: You can also add new fields based on your preferences.
Click Save.

Contact Organizer Matches Attributes
You will get two options in this section:
Add Field: You can also add new fields based on your preferences.
Click Save.

 Use coupon code:
  Something exciting is coming soon – stay tuned to find out! 🚀✨