Default Content Settings
The Default Content option in the WP Event Manager settings section allows users to save time by selecting organizer, venue and address of events in advance as default so that they dont have to add the organizer, venue and address to each event that comes under the same organizer.
Here are the steps to be taken:
- Go to wp-admin.
- Click on Event Manager.
- Select Settings.
- Click on the Default Content Tab.

You will find three dropdowns including:
- Default organizer: Select a default organizer from the dropdown.
- Default Venue: Choose venue from the dropdown list of venue.
- Default Address: Select a default address.

Setting up a dynamic message for event submission
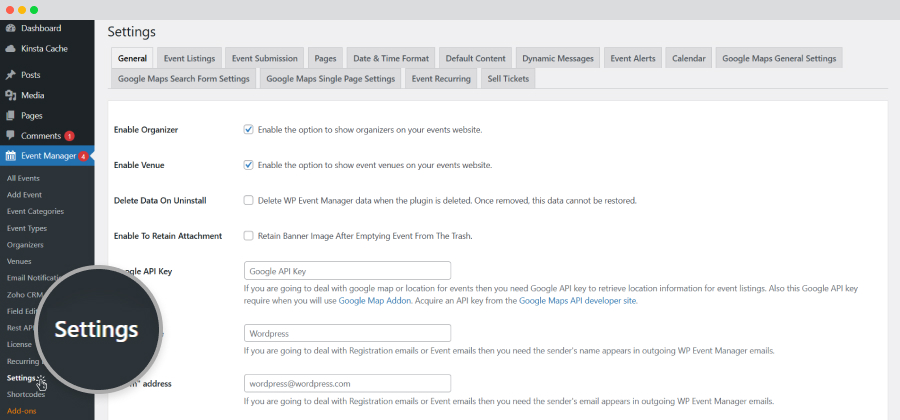
Now admins can share a dynamic message to event organizers once an event is submitted. To set this message, here are the steps to be taken:
- Go to wp-admin.
- Click on Settings.
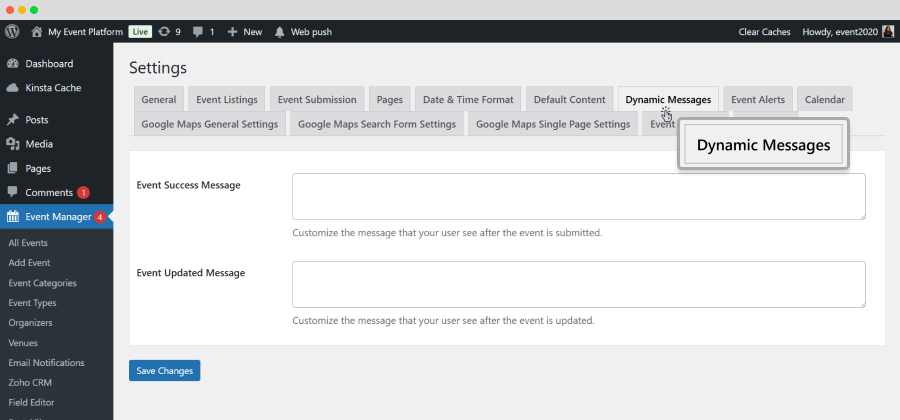
- Select the Dynamic Message tab.
- In this tab you will find the following options:
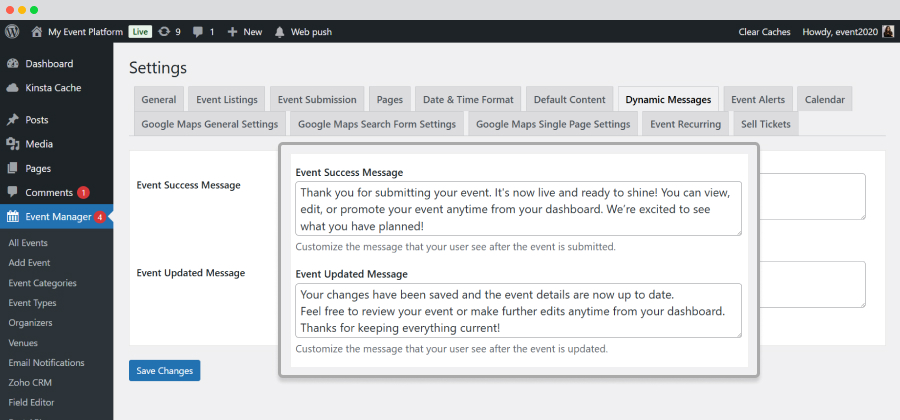
- Event success message: You need to add the message which you want to display event organizers once an event is submitted.
- Event updated message: You need to write the message here which you want to display event organizers once an event information is changed or updated.
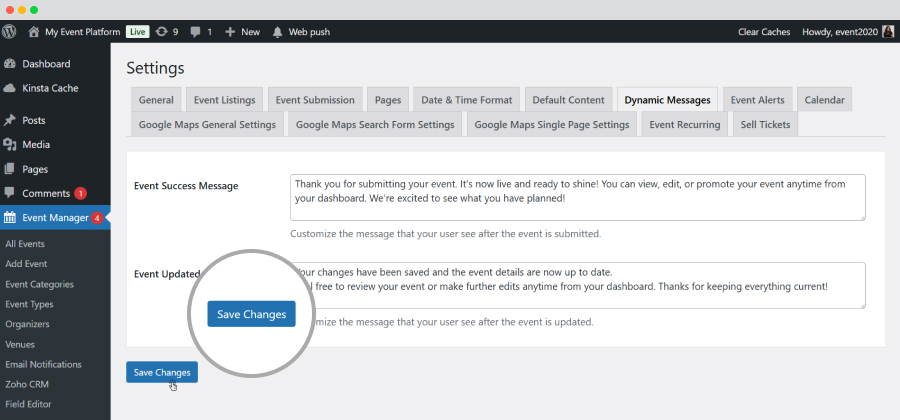
- Save changes.
Dynamic Mail Setting
When an event is created with WP Event Manager, usually a confirmation message is sent to the event organizer and website admin. We offer a pre built template for these messages and text needs to be added.
To set up your custom email message for event confirmation, here are the steps you need to take:
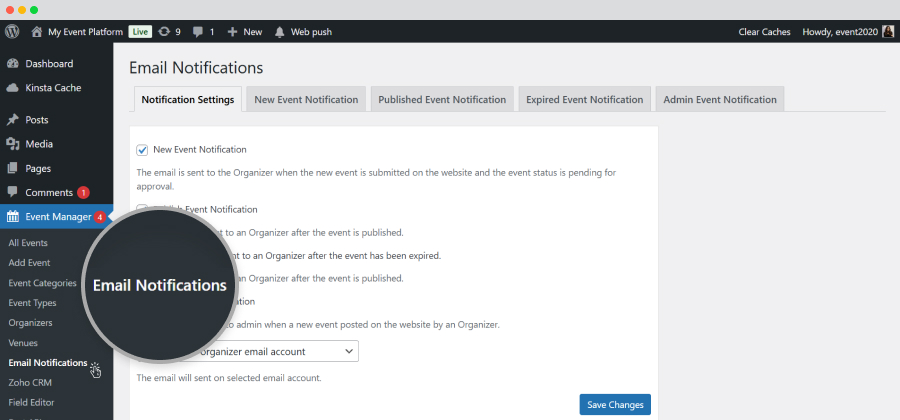
- Go to wp-admin.
- Click on Event Manager.
- Select Email notification.
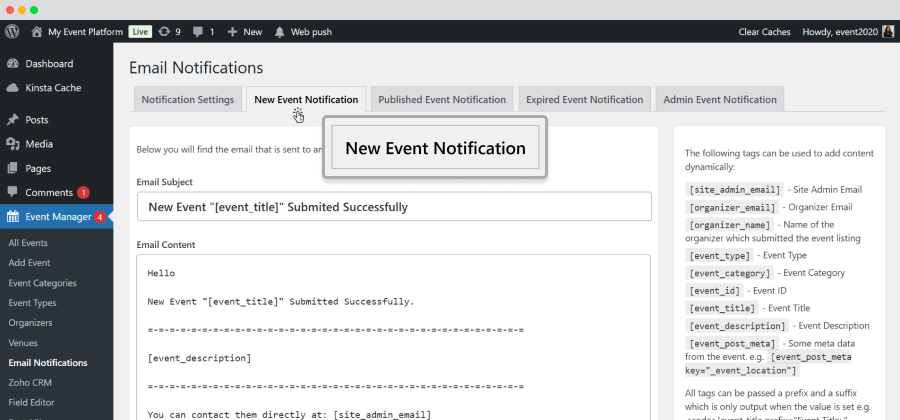
- Click on the “New Event Notification tab.
- Add your custom email content that will be sent to event organizer when a new event is created.
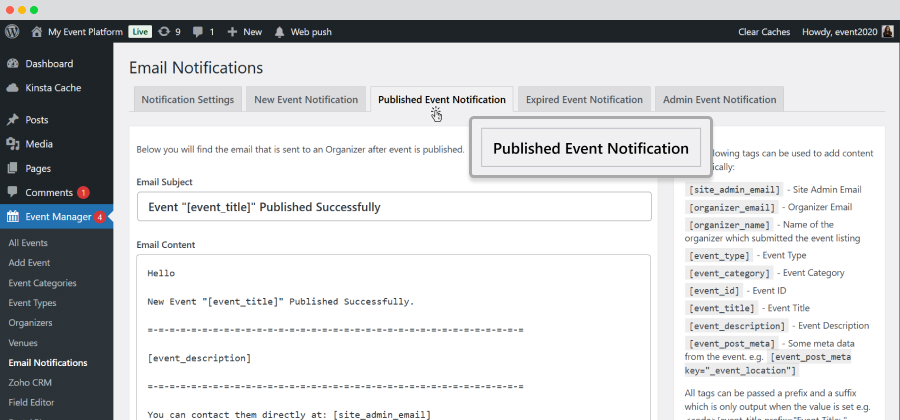
- Click on the Published Event Notification tab.
- Add your custom email content that will be sent to the event organizer when a new event is published.
The add-ons section added the Extension menu
We have recently improved the UI of our Addon section on the Admin side.
Here are the steps you need to take:
- Go to wp-admin.
- Click on Event Manager.
- Click on the Add-ons option.
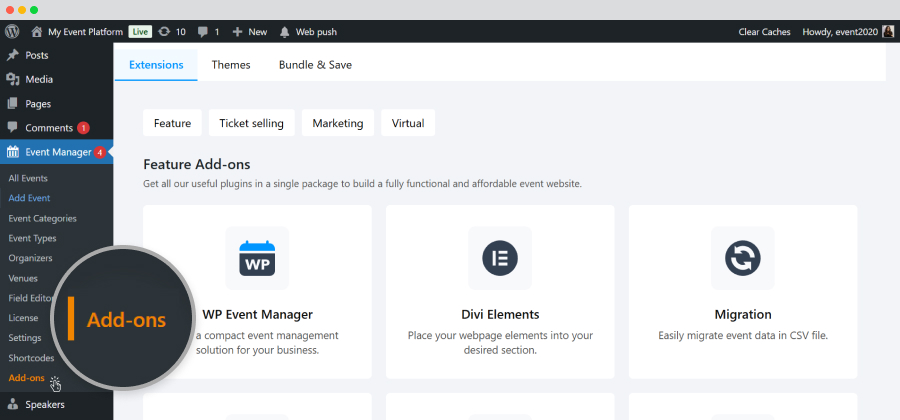
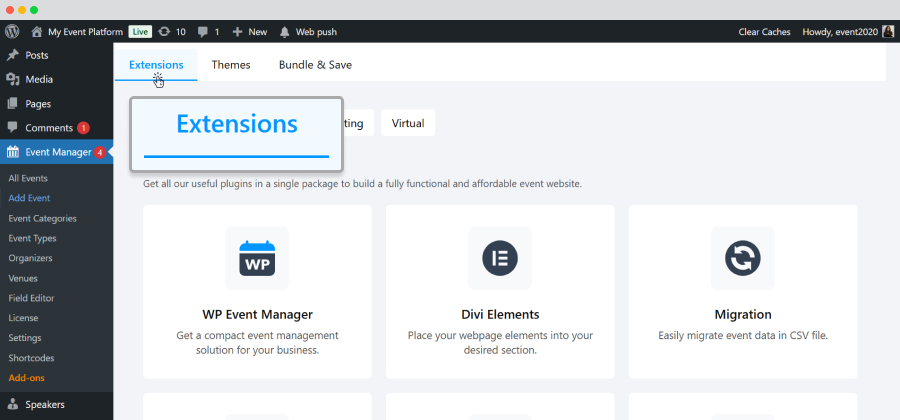
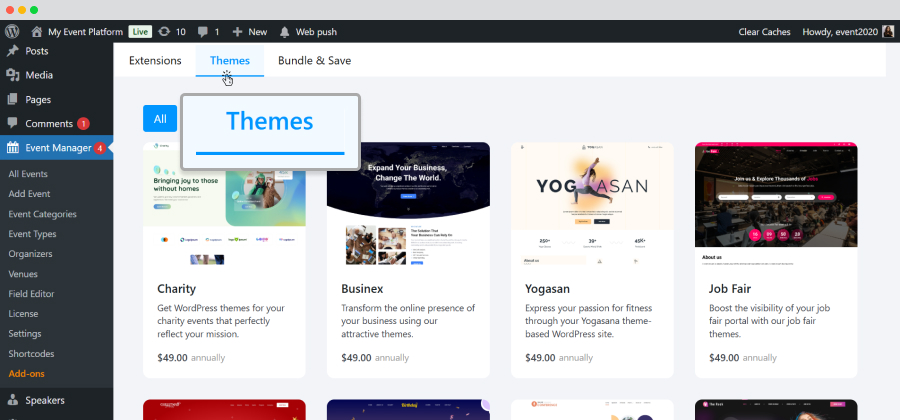
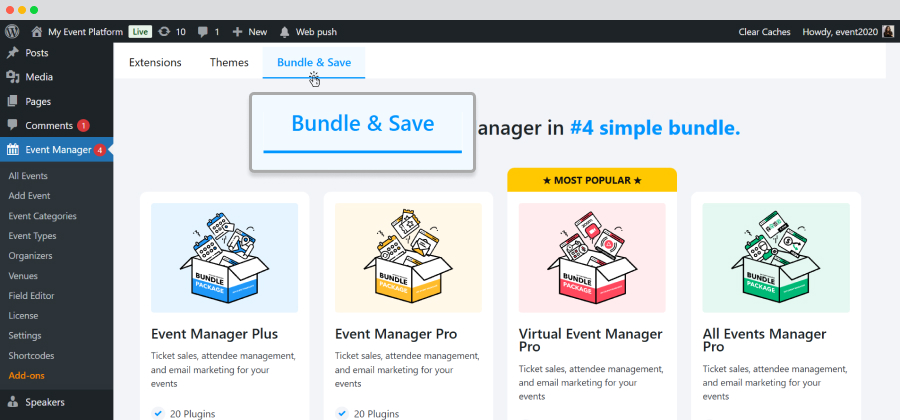
Here you will find three sections, which are mentioned below:
- Extensions: You will discover addons here divided into four categories, including:
- Feature: All the featured add-ons are displayed here.
- Ticket selling: All the ticket-selling add-ons are displayed here.
- Marketing: All the marketing addons will be displayed here.
- Virtual: All the virtual add-ons are displayed here.
- Themes: Here you will find the themes that are available at WP Event Manager.
- Bundle and Save: You will find four bundles that WP Event Manager offers, including.
- Event manager plus
- Event Manager Pro
- Virtual event manager pro
- All events manager pro
 Use coupon code:
  Something exciting is coming soon – stay tuned to find out! 🚀✨