Use coupon code:
  Something exciting is coming soon – stay tuned to find out! 🚀✨
- « Previous blog
-
Grow My Business
-
Oct 24, 2025
-
Oct 18, 2025
-
1564
-
0
- Next blog »
Creating recurring events manually on your WordPress site is time consuming and laborious. Recurring events include your weekly webinars, regular classes, monthly meetups, or yearly conferences, and setting them up again and again on your website eats up a lot of time and effort. Moreover, this is an error prone task when handled manually. A small mistake in updating them can ruin a whole session, affecting attendance.
Understanding recurring events in WordPress
Recurring events are the events that happen on regular intervals, such as weekly classes, monthly webinars, yearly team meets, etc. A WordPress recurring event is a feature that allows event organizers to create an event on their website that is conducted daily, weekly, yearly, or repeated after a certain time gap. Here, the event organizer has to create the event only once, and the rest of the repeated events will occur automatically on the mentioned time interval. The recurring event feature in WordPress removes the hassle of creating an event again and again. You can schedule the events as per your preferred time interval in a loop. If you are creating a WordPress recurring event, you must be aware of the term "Parent event," which is the main event that you create only once and the recurrent events will be created by the system without any manual effort. Now let us find out how to create a recurring event in WordPress in our next segment.How to create recurring events in WordPress
To create a recurring event in WordPress, you will need a recurring events plugin. We all know that WordPress offers a huge number of plugins in its repository, and this may confuse you. We recommend the Recurring Events plugin from WP Event Manager that offers all the necessary features you need to run your recurring events smoothly.1. Install WP Event Manager and Recurring events plugin
The first step to start working with the Recurring events addon is to install the WP Event Manager core plugin. The core plugin is absolutely free, and the installation process is also effortless. After installing the plugin, purchase the recurring events add-on and activate it. You can check our pricing page to get the Recurring events at the best price then install it into your system. Once you are done with the installation and activation process, you are ready to work with it. Note: You can test the recurring events plugin through our free demo to be sure of the plugin you are purchasing from us.2. How does the Recurring events plugin work
With WP Event Manager, you can create daily, weekly, monthly, and yearly recurring events with additional options for each (e.g., choosing specific days of the week) till the specified period.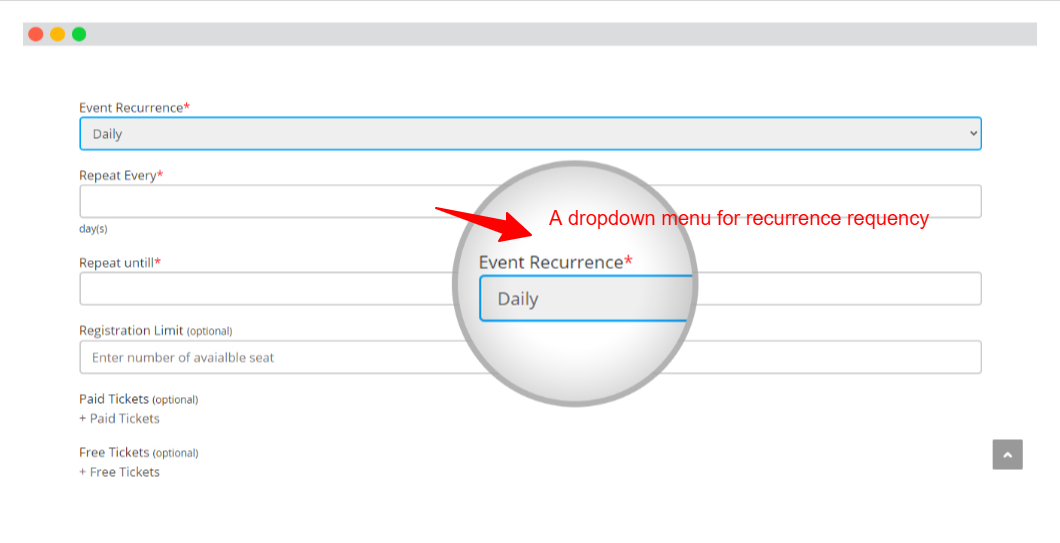
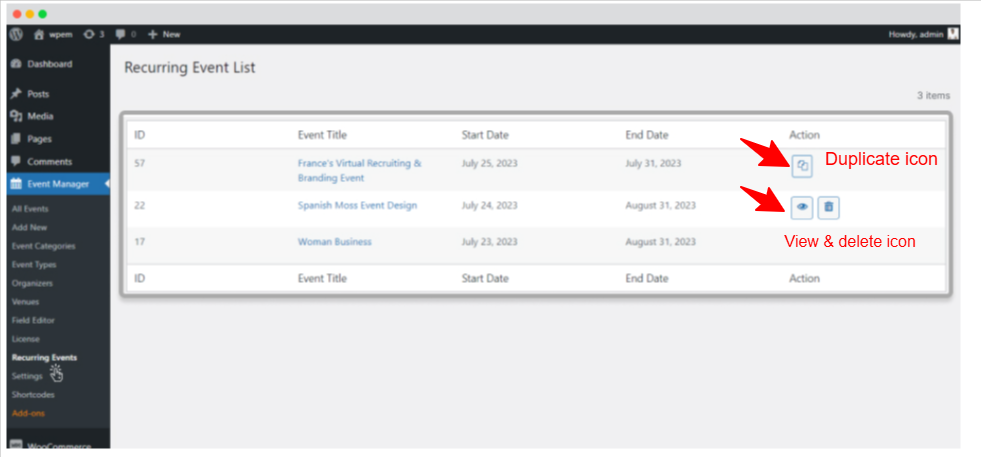
- Go to wp-admin>>Events Manager>>Recurring events.
- This will show the entire list of events.
- Each event carries a duplicate icon clicking on which you can generate repeated events.
- Along with the duplicate icon, you will also find the view and delete icons. The view icon offers the details of duplicated or child events and the delete icon helps you delete duplicated events.
3. Recurrence event settings
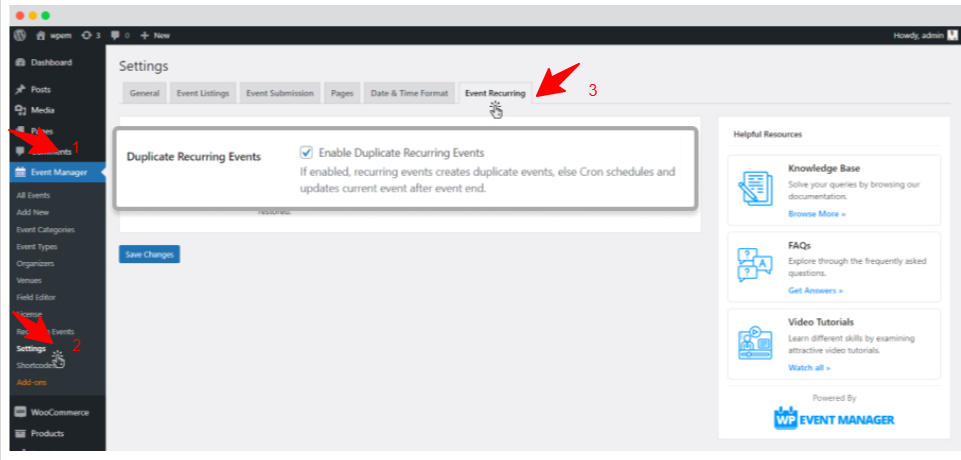
The settings section of the recurring events addon allows you to use the plugin as per your requirements by mentioning your preferences there. To access the settings section follow the below mentioned steps.- Go to wp-admin.
- Click on Events Manager.
- Click on the setting option.
- Select the Event Recurring Tab.
- Here you can find the option to enable or disable duplicate recurring events. If you enable this option, each recurring event will create duplicate events or else cron will schedule and update the current event after an event ends.
- Another option that you will see here is “Delete Data on Uninstall”. If you enable this option, then it will delete all your recurring events data when you uninstall the plugin. It is to be noted that once deleted, the data can not be retrieved.
Wrapping up
Remove all your hassles regarding your recurring event management with WP Event Manager's recurring events addons. It is easy to use and gives you full control on your events and the way they will be created.About the Author